Sod Installation
Professional sod installation installs pre-grown turf to create an instantly green lawn by laying uniform strips of grass on prepared soil. This approach accelerates landscape completion by combining soil preparation, leveling, and precise turf placement within a single project timeframe. Pre-grown sod retains an established root system, which integrates quickly with underlying soil, promoting rapid nutrient uptake and minimizing erosion. For example, uniform coverage from sod can reduce dust and runoff on slopes while delivering immediate curb appeal in residential and commercial settings.An additional benefit of professional sod installation is the minimal waiting period before the lawn is usable. Homeowners and property managers enjoy the transformation as soon as the project is complete, which adds value to the property almost immediately. The technique of using pre-grown sod means that the turf has already been nurtured under optimal conditions; therefore, when laid on a well-prepared substrate, it quickly adapts and begins the natural process of rooting deeply. This efficiency not only enhances the visual appeal but also supports a healthier, more resilient lawn over time.
Key Takeaways
- Bloom Landscaping Westchester Offers Professional Sod Installation Services for Both Natural and Artificial Sod in Westchester
- Their Comprehensive Installation Process Includes Thorough Soil Preparation, Precise Cutting and Fitting, and Proper Maintenance Techniques
- Bloom Landscaping’s Team Evaluates Soil Conditions, Prepares the Area, and Provides Detailed Care Instructions for Natural Sod Installations
- For Clients Seeking a Low-Maintenance Alternative, their Landscaping Westchester Company Offers Expert Artificial Sod Installation Using High-Quality Synthetic Turf Products
- The Artificial Sod Installation Process Involves Thorough Site Preparation and Secure Placement for a Seamless, Natural Appearance
Artificial Sod Installation
Artificial sod installation places synthetic turf systems that replicate natural grass appearance without ongoing mowing or watering requirements. Synthetic turf comprises multiple layers—drainage backing, infill material (such as coated sand or rubber granules), and resilient polyethylene or polypropylene fibers—each engineered for durability and realistic texture. This layered system not only provides the look of a pristine lawn but also delivers a surface that withstands heavy use while remaining low maintenance. The design also offers an environmentally friendly solution in regions facing water scarcity.
Before installation, the existing surface is excavated to create a sub-base of crushed stone compacted to a firm, permeable layer that ensures efficient drainage. A weed-inhibiting geotextile fabric is applied, followed by precise rolling of turf strips that interlock along seams with specialized adhesive or stitching. Once in place, infill is evenly distributed and brushed to stand fibers upright, delivering a soft, uniform surface suitable for high-traffic areas, pet runs, or sports applications.
A strong focus on the engineering and materials behind synthetic turf means the end product rarely requires replacement, even with heavy foot traffic. This durability is a major selling point, as property owners find that while the initial investment may be higher, the long-term savings in water, maintenance, and repair costs are substantial. Furthermore, many modern artificial turf systems now incorporate cooling technologies that help manage heat build-up on hot surfaces, offering added comfort during peak summer months.
Entity Attribute Value Sub-base Material Crushed stone compacted for permeability Drainage backing Function Allows water infiltration Turf fiber Composition UV-stabilized polyethylene for durability Infill Type Coated silica sand or rubber granules Installation step Mechanism Adhesive seam bonding or mechanical stitching Artificial sod’s key advantages include year-round color regardless of season, negligible water usage, and minimal maintenance aside from occasional brushing and debris removal. Because synthetic turf resists compaction and does not host common lawn pests, property owners benefit from consistent playability on sports fields and reduced long-term maintenance costs compared with living turf. Many customers appreciate that artificial solutions remove the uncertainty of seasonal changes, pest invasions, and unpredictable weather, providing a controlled landscape throughout the year.
Artificial sod installation involves laying synthetic turf systems that mimic natural grass, using materials like crushed stone for the sub-base and infill materials such as coated sand or rubber granules. The process includes excavating the existing surface, applying a weed-inhibiting fabric, and precisely rolling and interlocking turf strips. This method is designed for durability and realistic texture, suitable for high-traffic areas.
Roberts, M., Synthetic Turf Installation Manual (2022)
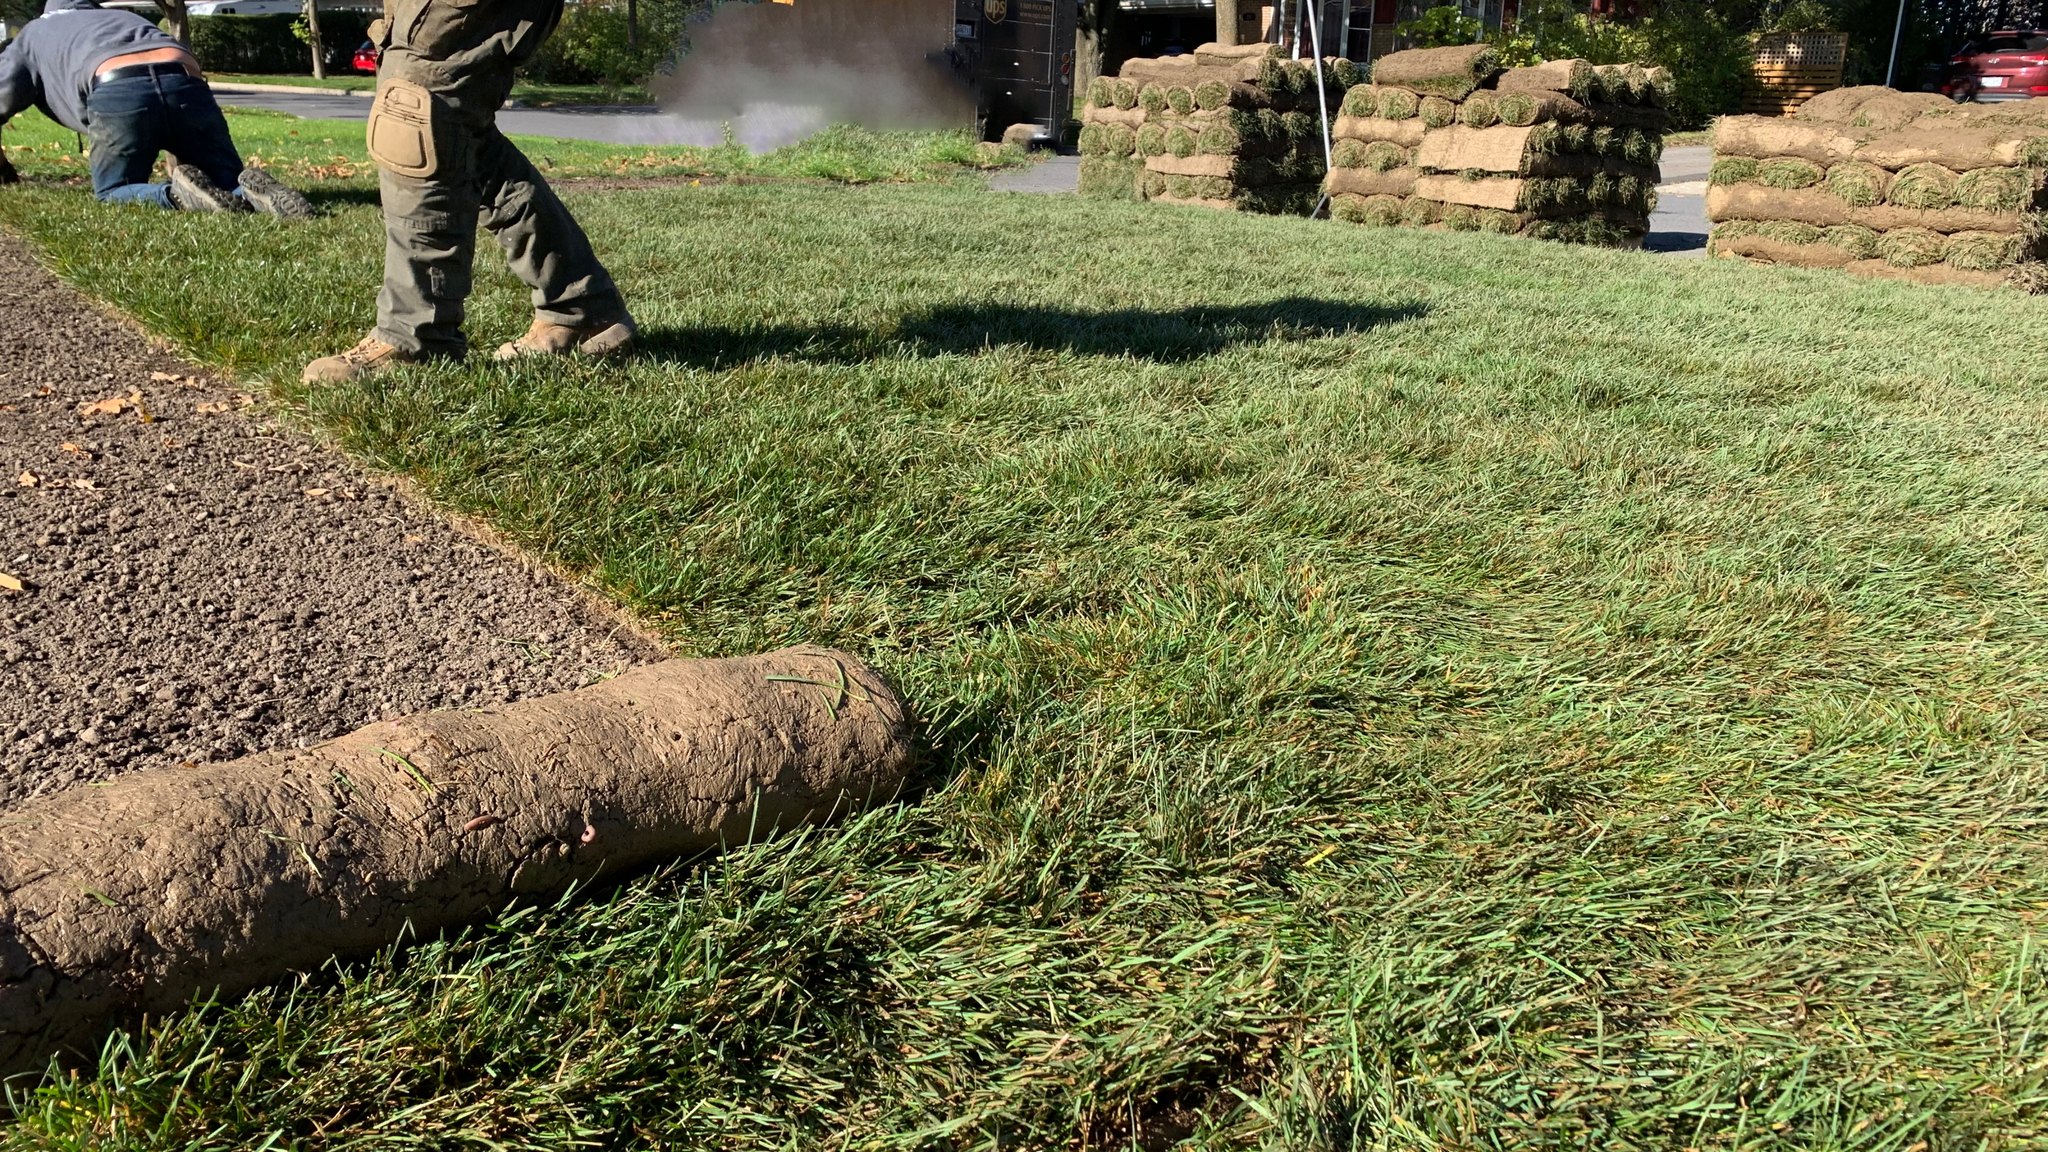
Sod Installation
Natural sod installation creates a thriving lawn by laying live turf rolls that contain grasses already adapted to the local climate and soil conditions. Species selection—commonly fescue, Bermuda, or Kentucky bluegrass—depends on regional temperature ranges, sun exposure, and intended lawn use. This customization in selecting the appropriate grass species ensures that each installation is suitable to the microenvironment of the property, delivering robust and sustainable growth over the long term.
Proper installation follows a sequence of soil testing, grading, trenching for edging materials, and soil amendment. Turf rolls are unrolled in staggered brick-like patterns to minimize seam visibility and ensure complete coverage. Edges are trimmed with sharp blades for clean boundaries, and the entire lawn is rolled to press roots into contact with soil. Immediate irrigation encourages root growth into the subsoil, which typically occurs within 14–21 days under regular watering schedules. Enhancing the installation process, professionals also consider post-installation care such as the timing and frequency of watering and the potential need for additional fertilizing based on the soil test results. This thoughtful approach not only elevates the initial appearance but significantly contributes to the longevity and sustainability of the turf. Homeowners are often educated on the proper techniques for maintenance and are provided with a timetable that helps them optimize watering and avoid overuse of chemicals that could disrupt the natural soil ecology.
Natural sod installation involves laying live turf rolls, with species selection based on climate and intended use. Proper installation includes soil testing, grading, and staggered laying patterns to minimize seams. Initial care involves regular watering to encourage root growth, which typically occurs within two to three weeks.
Turner, A., Best Practices for Natural Lawns (2024)
- Preparation: Soil pH adjustment and organic matter incorporation enhance nutrient availability.
- Laying technique: Side-by-side alignment with offset seams prevents erosion along straight lines.
- Initial care: Light daily watering for the first two weeks establishes root depth.
Additionally, natural sod installation creates a living, breathing landscape that can naturally combat erosion while also improving air quality by trapping dust and releasing oxygen. The natural energy cycle in the soil contributes to a continuously regenerating environment that not only supports the grass but encourages beneficial microbial activity. Over time, the lawn evolves into an ecosystem that balances water retention with drainage, ensuring that even in adverse weather conditions, the turf remains resilient. This symbiotic relationship between the soil and the sod provides long-lasting environmental benefits, making natural sod an attractive option for eco-conscious property owners.Properly installed natural sod creates a resilient turf that self-repairs wear, improves soil structure through biological activity, and delivers cooling shading effects critical for urban heat mitigation. As roots develop deeper anchor points, the lawn gains drought resistance and a robust defense against weeds. The improved soil structure also promotes a healthier ecosystem by supporting earthworms and other beneficial organisms, which in turn help to break down organic matter and further improve nutrient availability. This natural cycle ensures that the lawn continues to thrive with minimal intervention once properly established.